Jeman


Your VPN app says Connected. That tells you the tunnel is up. It doesn’t tell you that everything on your Mac is actually using it.
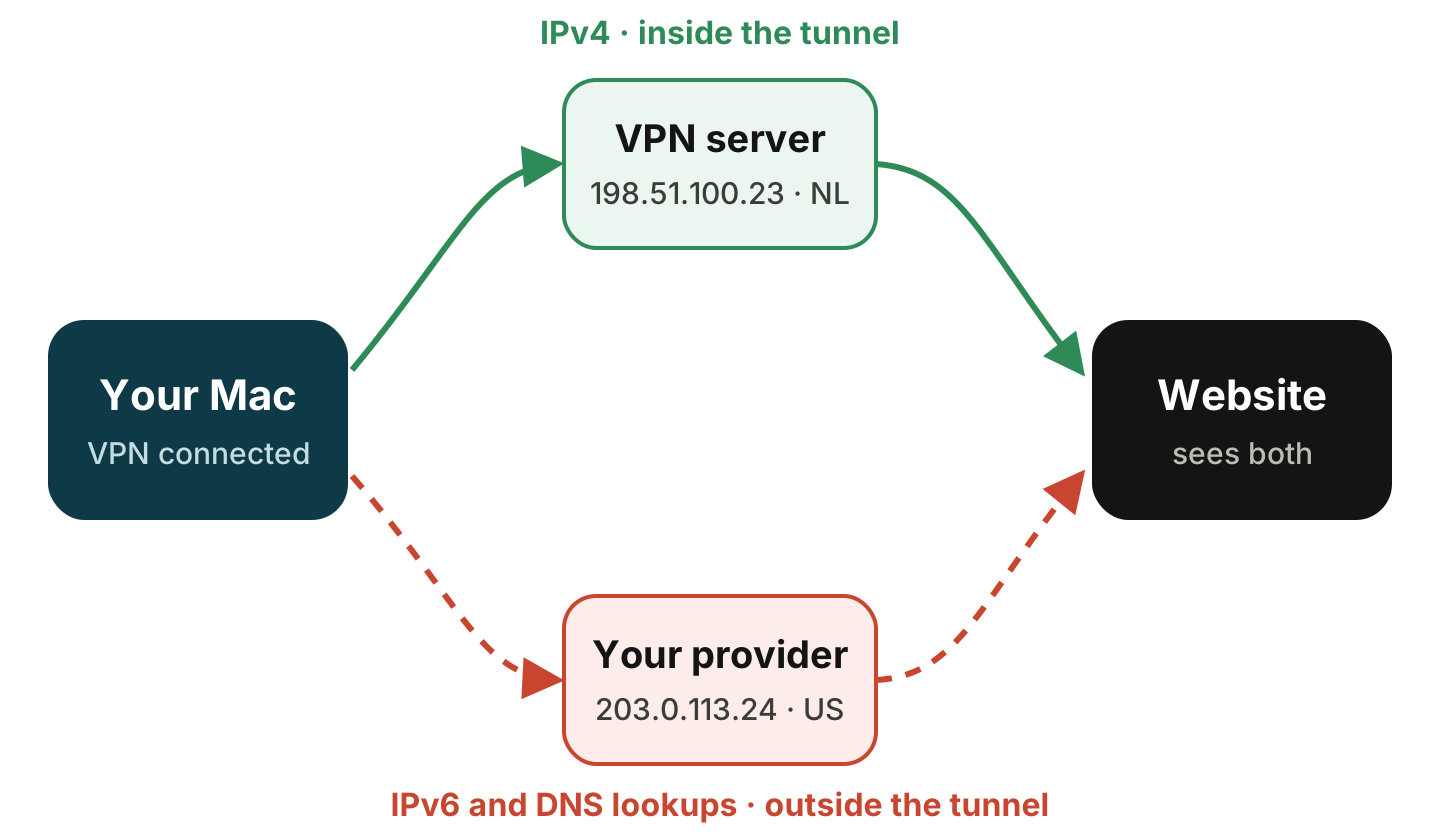
A leak is any traffic that leaves your Mac outside the tunnel, so websites or your internet provider can still see your real network. Three kinds come up again and again:
- IPv6 traffic. Many VPNs only tunnel IPv4. If your network also has IPv6, apps can reach IPv6-capable sites directly, from your own address.
- DNS lookups. Before your Mac connects to a site, it asks a DNS server where that site lives. If those questions still go to your router or your provider, they show which sites you visit and roughly where you are.
- WebRTC in the browser. The technology behind video calls can make a browser share network addresses with a web page, sometimes including ones outside the VPN.
The first three tests use Terminal (Applications › Utilities › Terminal). The commands only read information; they don’t change any settings.
1. Write down your real address
Turn the VPN off, then ask Cloudflare which address and country it sees. /cdn-cgi/trace is a plain-text diagnostics page that Cloudflare serves on its own site and on many sites it hosts.
curl -4 -s https://www.cloudflare.com/cdn-cgi/trace | grep -E '^(ip|loc)='
curl -6 -s https://www.cloudflare.com/cdn-cgi/trace | grep -E '^(ip|loc)='
The first command asks over IPv4, the second over IPv6. ip= is the address Cloudflare sees and loc= the country it places you in. Write both down. If the second command prints nothing, your network has no IPv6 and you can skip the IPv6 part below.
2. Turn the VPN on and compare
Connect the VPN and run the same two commands again.
- IPv4:
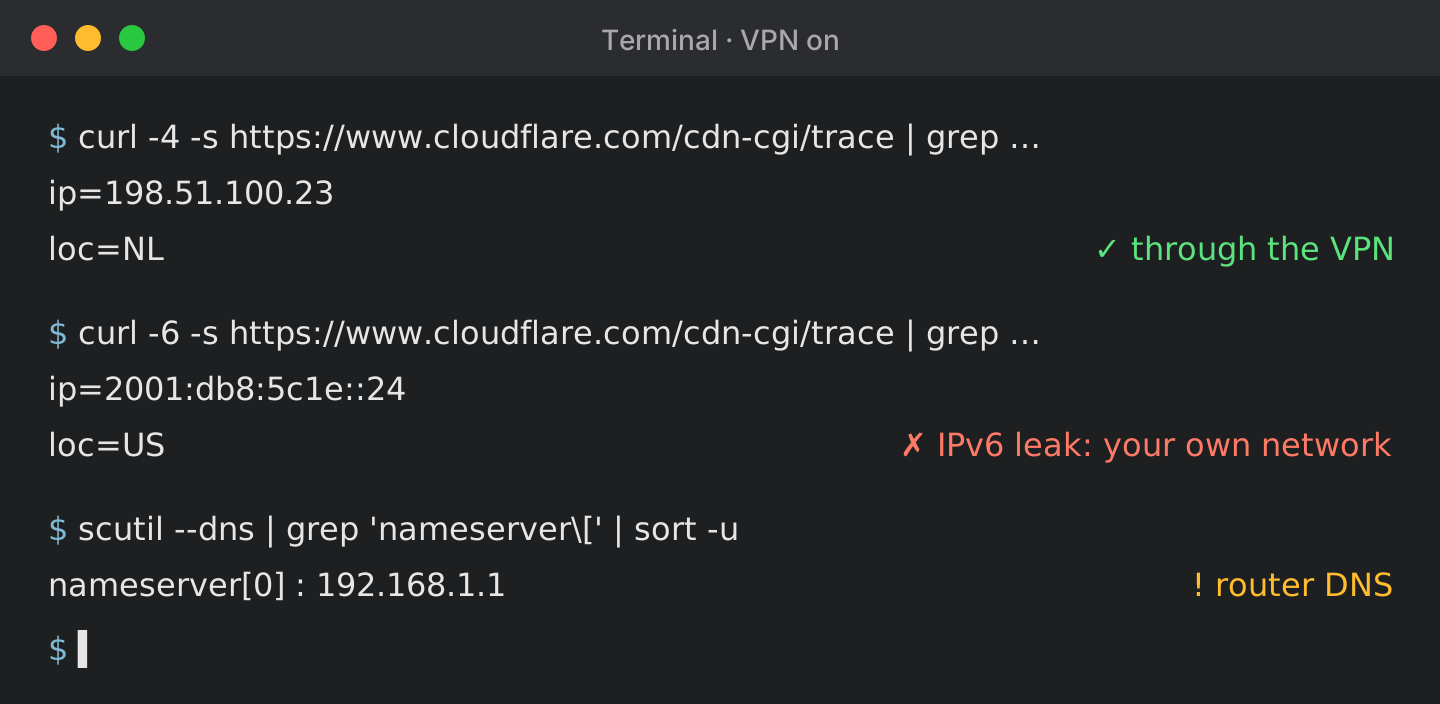
ip=should now be the VPN server’s address andloc=its country. If you still see your own address, the VPN isn’t carrying your traffic at all. - IPv6: you want either an address that belongs to the VPN, or no answer at all, which means the VPN blocks IPv6. If you get the same IPv6 address you wrote down in step 1, IPv6 is leaking.
3. See which DNS servers your Mac uses
scutil --dns | grep 'nameserver\[' | sort -uThis lists the DNS servers macOS is set up to use. With the VPN on, you’d normally expect servers that your VPN provides. If you only see your router (often an address like 192.168.1.1) or your provider’s servers, your lookups are probably traveling outside the tunnel.
Some VPN and proxy apps answer DNS inside the app and still show other servers here, so treat this as a strong hint rather than proof. Your VPN’s settings are the place to confirm it; look for an option called something like DNS leak protection.
4. Check your browser for WebRTC leaks
WebRTC lives in the browser, so Terminal can’t test it. With the VPN on, open a WebRTC leak test page in the browser you actually use and look for any public address that matches what you wrote down in step 1. Local addresses such as 192.168.x.x are normal and harmless.
If your real public address shows up, turn on your VPN app’s WebRTC protection if it has one. In Firefox you can also turn WebRTC off by setting media.peerconnection.enabled to false on the about:config page; this also disables video calls in the browser.
How to fix what you found
-
IPv6 leak. Turn on your VPN’s IPv6 leak protection or “block IPv6” option. If it has none, you can turn IPv6 off for Wi-Fi while you use the VPN, and back on later:
sudo networksetup -setv6off Wi-Fi
sudo networksetup -setv6automatic Wi-Fi
networksetup -listallnetworkservicesshows the exact service names on your Mac. -
DNS leak. Turn on the VPN’s DNS leak protection, or use the DNS that your VPN or proxy provides. If your VPN offers neither, set public DNS servers in System Settings › Network › Wi-Fi › Details › DNS instead of your router, so lookups travel through the tunnel too; servers in your exit’s region keep the answers consistent with it.
-
WebRTC leak. Use your VPN’s browser protection, or the Firefox setting above.
-
Everything at once. If your VPN has a kill switch, turn it on. It stops traffic when the tunnel drops, instead of letting it fall back to your own connection.
Leaks come back
A clean result is a snapshot, not a guarantee. Leaks tend to return when you switch Wi-Fi networks, wake your Mac from sleep, the VPN reconnects to a different server, or an app updates. Run the checks again after any of these, or let something watch for you.
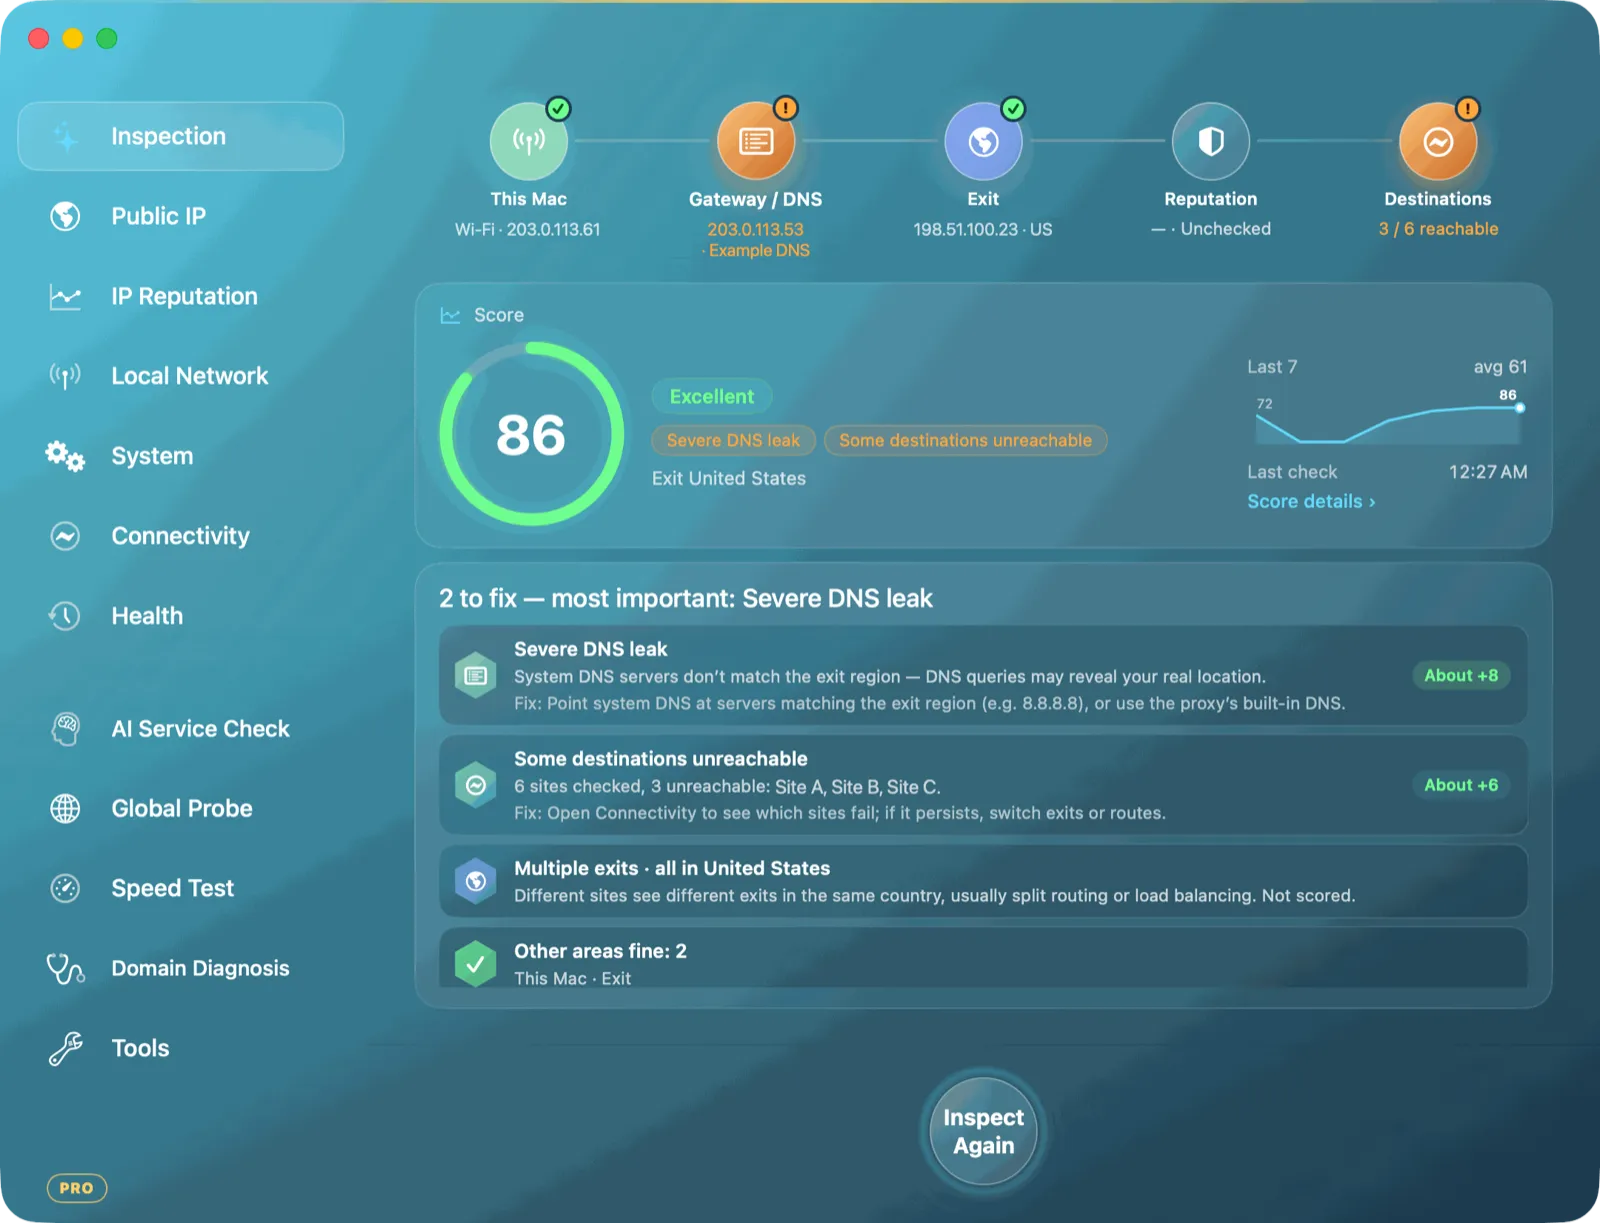
Netlink sits in your Mac’s menu bar and runs these checks for you. Its inspection walks from your Mac through DNS to your exit, flags IPv6 traffic that may bypass the tunnel and DNS servers that don’t match your exit, and explains each problem with a fix. In the background it checks your exit IP every 1 to 30 minutes and notifies you when it changes.